

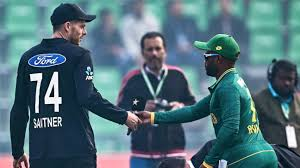
The exciting clash between the New Zealand National Cricket Team and the South Africa National Cricket Team delivered a thrilling contest. Although New Zealand set a competitive total, South Africa chased it successfully, showing strong batting depth and smart game awareness. This blog article shows the complete New Zealand vs South Africa Match graphs.
Match Overview New Zealand vs South Africa Match graphs
First of all, New Zealand came in to bat and posted a decent total on the board. Their innings had some solid partnerships; however, they struggled to accelerate in the final overs. As a result, they finished with a score that looked competitive but not unbeatable. New Zealand vs England: Clash of the Decades
On the other hand, South Africa approached the chase with confidence. Right from the beginning, they maintained a steady run rate, and importantly, they avoided losing early wickets. Consequently, this gave them a strong foundation for the middle overs.
The first image sets the stage for a high-stakes encounter where South Africa emerged victorious, defeating New Zealand by 7 wickets. It was a clinical chase by the Proteas, who managed to overhaul the target with nearly three overs to spare.
- Venue: Narendra Modi Stadium, Ahmedabad.
- Result: South Africa (178/3) beat New Zealand (175/7).
- Key Performers: Aiden Markram anchored the chase with a blistering 86, while Mark Chapman was the lone fighting spirit for the Black Caps with 48 runs. The Final – ICC Men’s T20 World Cup 2026
Key Batting Performances New Zealand vs South Africa Match graphs
Most importantly, Aiden Markram played a match-winning innings. His aggressive yet controlled batting turned the game in South Africa’s favor. Moreover, his ability to find gaps and hit boundaries under pressure made a huge difference. Who Will Be the Champion of T20 World Cup 2026?
Aiden Markram played a captain’s knock (or a match-winning one), scoring 86 runs off just 44 balls. His strike rate of 195.45 ensured that the required run rate never became a pressure factor. On the flip side, Mark Chapman top-scored for New Zealand with a respectable 48 off 26 balls, but he lacked the support needed to reach a massive total.
Meanwhile, for New Zealand, Mark Chapman stood out with a valuable contribution. Although he tried to stabilize the innings, the lack of support in the death overs limited New Zealand’s total.
New Zealand’s Batting Performance New Zealand vs South Africa Match graphs
Looking at the full scorecard for the Black Caps, we see a story of “starts” that weren’t converted into big scores.
- The Top Order: Finn Allen provided a quick burst (31 off 17), but the middle order struggled to maintain momentum.
- Middle Order Woes: Glenn Phillips fell for just 1 run, which put significant pressure on Daryl Mitchell (32) and Mark Chapman.
- The Finish: James Neesham contributed a useful 23 at the end, but a total of 175 on an Ahmedabad track proved to be sub-par against a firing South African lineup.
Bowling Impact New Zealand vs South Africa Match graphs
In addition to batting, South Africa’s bowling played a crucial role. Marco Jansen delivered an outstanding spell, picking up key wickets at important moments. Because of his performance, New Zealand couldn’t build the momentum needed in the final overs.
Marco Jansen was the undisputed star with the ball. Despite being a bit expensive (Economy: 10), his knack for taking wickets was crucial. He finished with figures of 4/40 in 4 overs, effectively breaking the back of the New Zealand batting lineup. Tim Seifert In Final 2026
Conversely, New Zealand’s bowlers tried to defend the target. However, they failed to apply consistent pressure, and as a result, South Africa comfortably chased down the score.
South Africa’s Bowling Precision
South Africa’s bowling attack showed great variety and discipline. While Jansen took the wickets, others played the role of “restrictors.” Nz women vs Zim women
- Consistency: Kagiso Rabada was incredibly economical, giving away only 27 runs in his 4 overs (Econ: 6.75).
- Support Cast: Keshav Maharaj, Lungi Ngidi, and Corbin Bosch all chipped in with a wicket each, ensuring that New Zealand never established a massive partnership.
- Experimental Over: Interestingly, Aiden Markram bowled one over for 15 runs, likely trying to fill a gap in the middle overs.
Turning Point of the Match: New Zealand vs South Africa Match Graphs
Interestingly, the turning point came during the middle overs of South Africa’s innings. At that stage, Markram shifted gears, increasing the run rate significantly. Consequently, the required run rate dropped, making the chase much easier. New Zealand vs Sri Lanka Match Today
The Clinical Chase by South Africa
The final image illustrates how comfortably South Africa reached the target of 176. It was a true team effort led by a superstar performance.
The Batting Blitz New Zealand vs South Africa Match graphs
While Markram was the protagonist, he was supported by cameos from Quinton De Kock (20), Ryan Rickelton (21), and David Miller (24)*. Their collective aggression meant the chase was completed in just 17.1 overs.

New Zealand’s Bowling Struggle
The Kiwi bowlers found it difficult to defend the total.
- Lockie Ferguson and James Neesham managed to pick up a wicket each, but they couldn’t stop the flow of runs.
- Mitchell Santner and Matt Henry went wicketless, which ultimately allowed South Africa to cruise to the T20 World Cup title. Mens T20WC 2026 (INDIA MENS CRICKET TEAM VS SOUTH AFRICA NATIONAL CRICKET TEAM)
Final Result Summary
- New Zealand set a competitive score
- South Africa chased successfully with wickets in hand
- Aiden Markram’s innings proved decisive
- Marco Jansen’s bowling restricted NZ effectively
Conclusion
Overall, this NZ vs SA match was a perfect example of balanced cricket with both bat and ball. While New Zealand showed promise, South Africa’s composure and match-winning performances ultimately secured their victory. Therefore, this game highlights why South Africa remains one of the most dangerous teams in international cricket.